
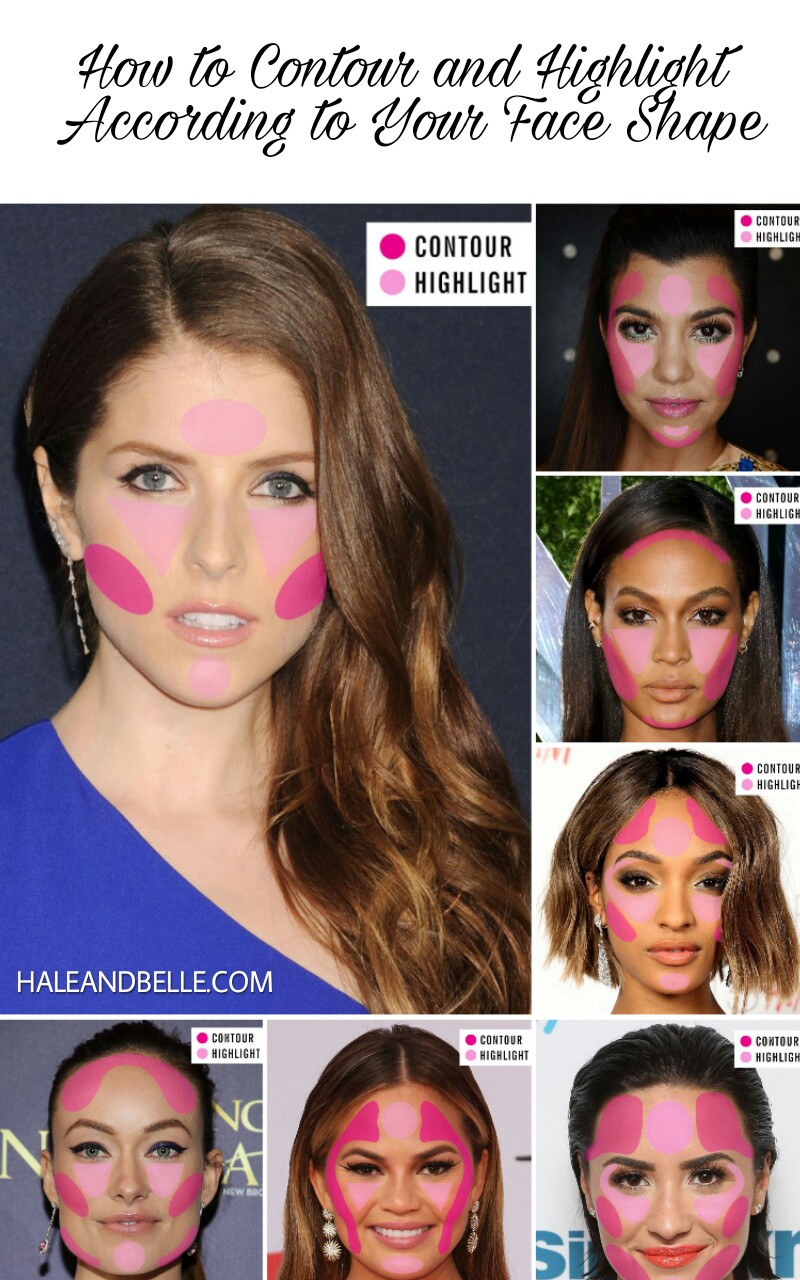
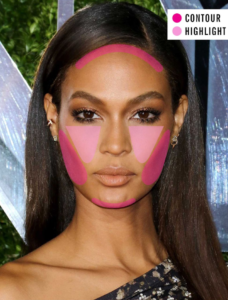
Contouring and highlighting are just like the hot brownie and vanilla ice cream duo – they go hand in hand. Before we begin with the stunning contouring maps, allow us to elaborate these two makeup techniques.
Contouring is a makeup technique when we use a matte (take note: not shimmery) powder, or some pencil product that’s two shade darker than your skin tone to areas you’s that you would want to sculpt / shape / or define. These face features usually include the nose, forehead, cheekbones, and chin.
Highlighting (or you could say, strobing) is another makeup technique that actually help make a balance by accentuating the high planes of your face with light concealer or highlighter product. Here, you’d need a concealer shade that’s two shade lighter to your skin tone to get a proper strobing or highlighting. Or otherwise, if you’re using some highlighting product, go for a shade that flatters your competition. Highlighing is done on the high plane areas of the face, to even more emphasize them, that naturally capture the light.
Quick Tip:
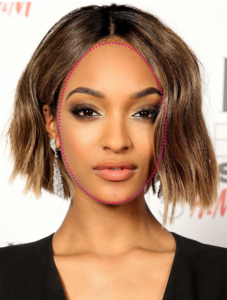
Here’s a handy guide for you. Figure out your contouring map as per your face shape, and the differences will blow your mind.
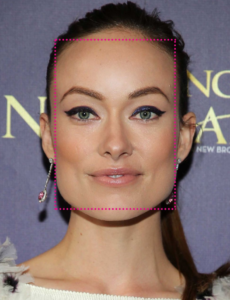
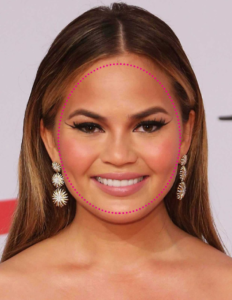
But, in case you don’t know which shape category your face falls in, you can figure it out here.
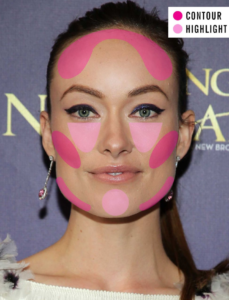
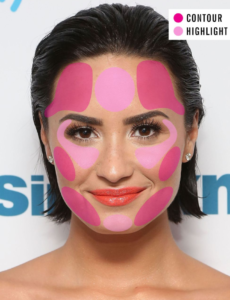
DIAMOND FACE SHAPE:
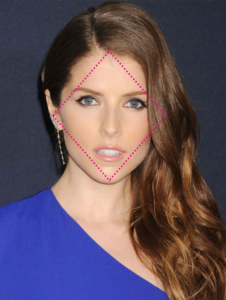


Where You Should Contour:
The area right below your cheekbones is where you need to begin with. Start from the ear, ending in the middle of the cheeks. Buff out the harsh contouring lines using a kabuki brush, gently swirling in upward directions.
Where You Should Highlight:
- Your under eye area is where you need to begin from. Apply the product in an upside-down triangle shape and also, along your brow bone to brighten up the eyes.
- The forehead mid and middle area of your chin is your next way to go. These areas are naturally narrow, to which you need to broaden using the highlighter technique.
RECOMMENDED READS: SAVE, SPEND, SPLURGE – POWDER HIGHLIGHTERS TO GLOW LIKE A BOMB
HEART FACE SHAPE:

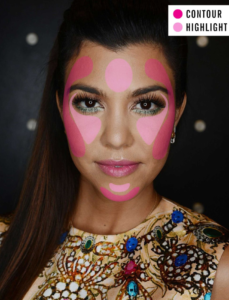

Where You Should Contour:
- Heart faced people have wider upper half while the lower half of the face being more narrow. Here, you make a balance by contouring along your hairline i.e. the sides of your forehead and temples. This gives an illusion to a symmetrical looking face.
- The area right below your cheekbones, starting from the ear and ending in the middle of the cheeks.
- That small area right below your chin to soften it out.
Where You Should Highlight:
- Highlight at the under eye areas, in an upside-down triangle shape, to brighten up your eyes.
- The middle areas of the forehead and the chin are naturally narrow, to which you need to illude by giving a broadened look using highlighter product there.
OBLONG FACE SHAPE:
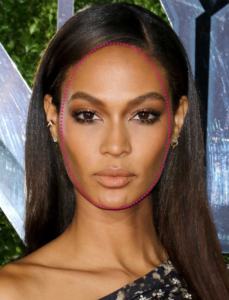

Where You Should Contour:
- Because the oblonged face shaped people have a face twice as long as its width. So, contouring along the hairline will help illude a lower hairline.
- Contour the chin to create the illusion of rounder face.
- The area right below your cheekbones, starting from the ear and ending in the middle of the cheeks.
Where You should Highlight:
Brighten up your eyes by highlighting the under eye area in an upside-down triangle shape.
OVAL FACE SHAPE:

Where You Should Contour:
- Oval face shaped ladies got to slightly contour the sides of their forehead to create an illusion to narrower hairline.
- Contour the areas of your cheeks, right below your cheekbones, starting from the ear and ending to the middle cheeks.
Where You Should Highlight:
- In the middle areas of your forehead and the chin.
- Under your eyes, in the upside-down triangle shape, and along the brow bone to brighten up the eyes.
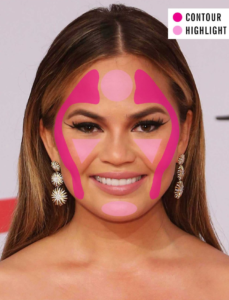
RECTANGLE FACE SHAPE:

Where You Should Contour:
- Along the sides of the forehead to illude the hairline to narrower shape.
- Along the hairline to create an illusion of a lower hairline.
- Under your jawbones to help the the jawline look more narrow.
- Contour the areas of your cheeks, right below your cheekbones, starting from the ear and ending to the middle cheeks.
Where You Should Highlight:
- In the middle area of the chin.
- At the under eye areas in upside-down triangle shape, and along the brow bone.
ROUND FACE SHAPE:

Where You Should Contour:
- Along the sides of your forehead and the temples to illude this wider area of your face to more narrow.
- The area, right below your cheekbones, starting from your ears to the middle area of the cheek, and then curving the contour line down towards the jawline to make your face look long.
Where You Should Highlight:
- In the middle areas of the forehead and the chin.
- At the under eye areas, in the upside-down triangle shape, to brighten up the eyes.
SQUARE FACE SHAPE:

Where You Should Contour:
- Along the sides of forehead to create an illusion to narrower hairline.
- Under the jawbone to make the jawline appear more narrow.
- The area right below your cheekbones starting from the ear and ending to the middle area of the cheek.
Where You Should Highlight:
- In the middle area of your forehead and the chin.
- At the under eye areas, in an upside-down triangle shape, and also along the brow bone for those brightening eyes.
And so, that’s it. If you liked the post, do not forget to share with your dearies. Sharing is caring, afterall! We’re waiting to hear from you in the comment box below. The opinion of every individual counts us a lot!


Leave a Reply